

I thought I’d share a little of one of the processes I use to make some of my Bedrock Rose creations. One of my favorite tools is the hydraulic press which comes from a very cool American company out of Tucson called Potter USA.

Here she is--I call her “Rosie” because together We Can Do It! It’s quite a workout to ratchet her up to her full 20 ton potential.
To make my creations, I typically start by casting a silver ingot, roll the ingot in the rolling mill to create a sheet of metal at the desired thickness. Here’s a condensed video clip of me pouring molten silver into an ingot:
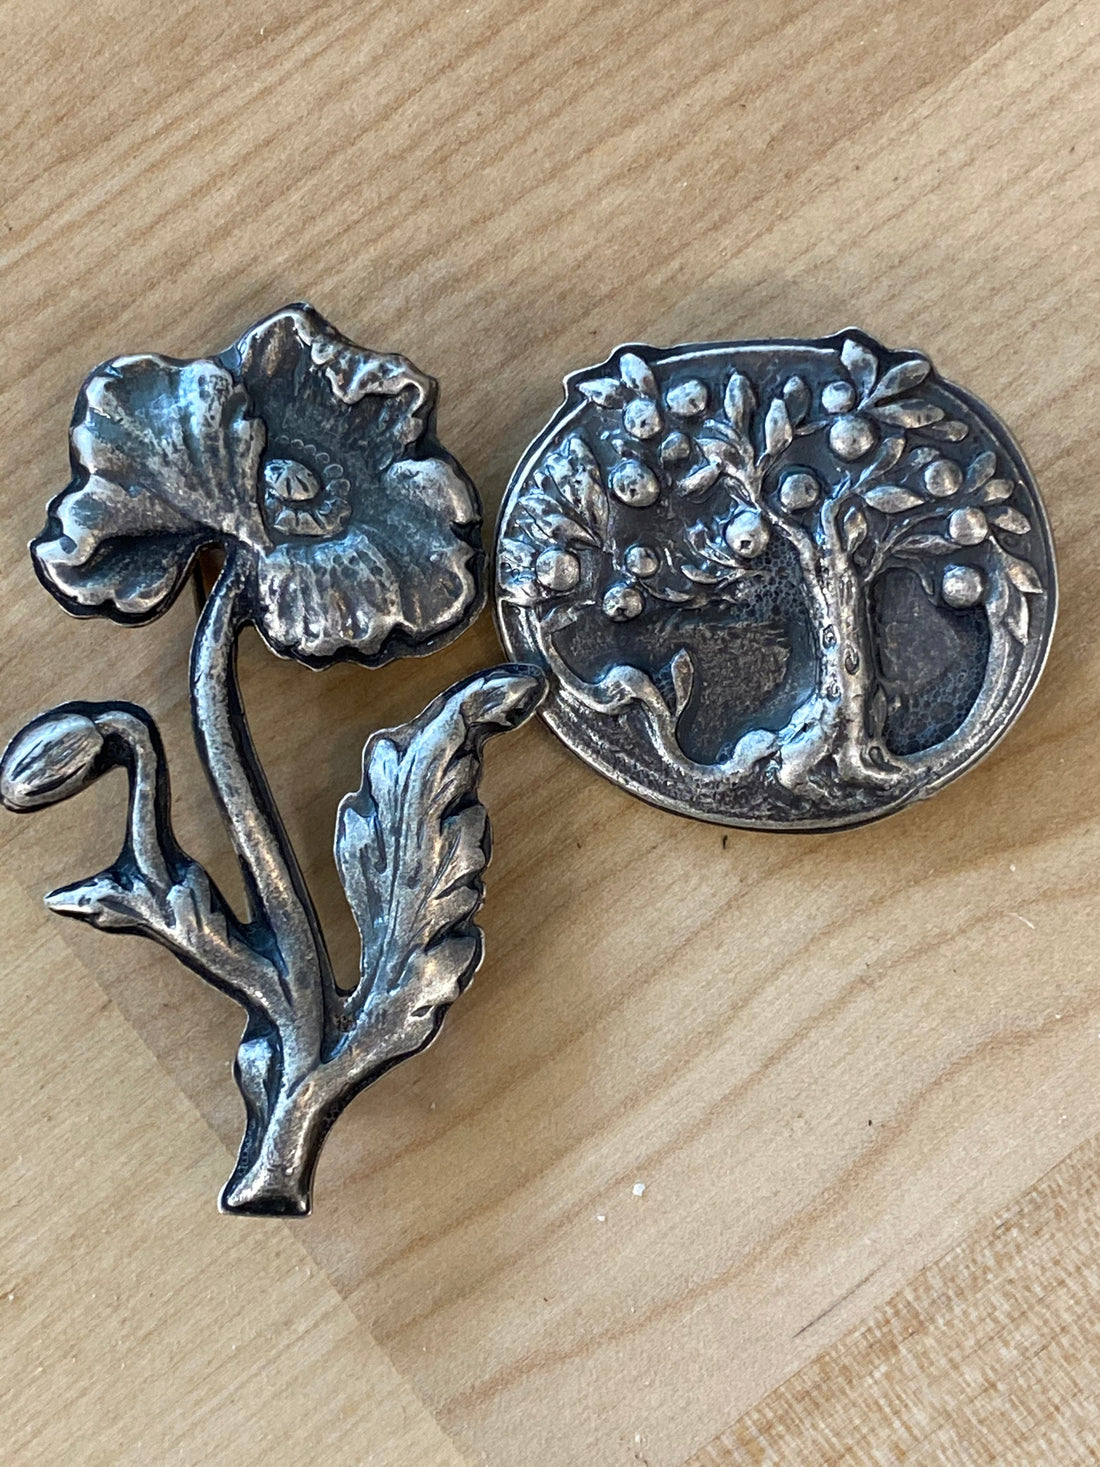
For a piece like the Paris Orchard or the Poppy Brooch, I need to reduce the thickness of the ingot from its 4 mm starting point down to about 1 mm. That takes several trips through the rolling mill and is a very gradual process. After about three-four passes, the metal will have reduced only about 0.5 mm, but has hardened in the process and could begin cracking. It must be annealed to regain malleability. I do that by heating it with the torch until it reaches ‘annealing temperature’. I must be careful not to get it too hot, or it could begin melting. Once annealed, the metal has now become oxidized and needs an acid pickle bath. I keep this pickle in an old crock pot at my soldering station. A friend saw this crock pot in a photo and wondered if I was cooking in there!

Once I’ve reached the desired 18 gauge thickness, it’s time to start pressing into the impression die.

To get the most movement of metal with every pressing in the hydraulic press, the silver is covered with little urethane bits that press down into the nooks and crannies of the die. Rosie is a 20 ton manual press, and we get quite a workout.
After every pressing, guess what happens? The metal is hard again. Back to the annealing pan it goes. Pickle Bath, wash, and thoroughly dry. Over and over. I actually kept track of how many times I had to go through the process on these two dies—FIVE. That’s actually not so bad, I’ve had to do more with other dies. It’s a good thing I love what I do, and I've redefined Netflix and Chill—Rosie and I stream all sorts of shows to keep us company in these long hours in the studio.

Some of my little neoprene bits are taking a beating!

This photo shows some of the movement of the silver into the die post press.

Here’s a shot of one of the pressings just before the metal meets the pressure!

Now it’s beginning to really take shape! To get the last fine details of the die, it’s important not to have too much metal surrounding the area to be pressed because it hampers further movement of metal into the die, so I’ve sawed off the excess silver before pressing again to get the final details.

After excess metal was removed, time to anneal again before the next pressing.
This is just a starter taste of how a Bedrock Rose piece makes it journey from casting the ingot to pressing. There were several more bits to this labor of love that I forgot to take photos of, but I’ll stop here and just give you a glimpse of the final pieces, all ready to help you Complete Your Look.


Using impression dies with Rosie is also just one of the methods I use in making Bedrock Rose pieces. Stay tuned for more!